[Я пиарюсь] How I’m creating a digital mini-guitar
Автор
Сообщение
news_bot ®
Стаж: 7 лет 9 месяцев
Сообщений: 27286
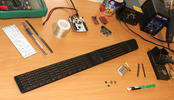
In this article, I’ll try to describe roughly how I’m creating a device, from the idea to realization of the usable prototype.
My name is Dmitriy Dudarev. I develop electronics, and really enjoy creating different portable devices. I also enjoy music. Half a year ago, I borrowed acoustic guitar from my friend, so that I could learn to play it from lessons on Youtube and tablatures. It was a hard work. Maybe, I did something wrong, or tried not so hard, or fine motor skills prevented multiplication in my predecessors’ community. In any case, I couldn’t achieve anything but sounds of raspy strings. My resentment was strengthened by constant string detune. And others didn’t really enjoy much listening my uneven Nothing else matters for thousand times.
But, going through all these tortures, I haven’t forgotten the main rule of electronics engineer. If something exists, you can put microcontroller there. Or, at least, make a portable electronic modification.
Idea
Structure of digital guitar started to emerge in my mind.
First of all, I’ve made a list of the device requirements:
- The device must imitate guitar with 6 strings and 12 frets on the finger-board
- It must be compact, ideally – folded, so that you could take it anywhere
- It must be able to connect to all popular OSs — Android, IOS, Windows, Linux, MacOS, and defined by them as a midi-device without any drivers
- Battery-powered
- The connection should be wireless (however, if it is a USB-port there for charging, let it be able to connect via cables, too)
- Possibility to start playing at once, without necessity to adapt your wrist ligaments for a long time
- Each string and each finger-board element must have one LED, so that it you could run the melody tablature, and the guitar could show where you should put your hands
- Possibility to use main guitar-playing techniques: hummer on, pull off, slide, vibrato
- Delay of midi-command transmission is no longer than 10 ms
- Everything must be assembled from available materials, without difficult technical operations and expensive electronic components
Certainly, it will be necessary to create an app for mobile platforms, where it will be possible to choose a tablature for learning with LEDs, choose an instrument (acoustic, classical, electric guitar, with different filter presets, etc.), and play sounds.
Supposedly, I must get a compact instrument which you can play like a guitar without analog drawbacks, and equipped with visual learning system.
Sounds realistic.
Analogs
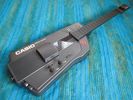
Well, first of all, being armed with the thought that nowadays it is almost impossible to invent something really new, and somebody has already done it, I’m looking up in Google. In fact, it turned out that the first digital guitar was created back in 1981, but it wasn’t used widely because of limited functionality.
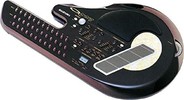
Modern compact midi-guitars also exist, but they are designed for more professional target audience, expensive, and, above all, without “press-on-LED” mode. There are also exotic variants, with iPad instead of strings or in the shape of mollusk.

So I can start.
Proof of concept
I decided to start with proof of concept. Minimal prototype offhand. First of all, I should define the element base.
Controller
In my projects, most often I use STM32. They are powerful, inexpensive, available. I’ve chosen STM32F042. It has USB (moreover, with special internal 48MHz-generator, not to put external quartz), 32-bit core, and all the necessary peripherals. And all this costs less than a buck.
I decided to leave wireless connection for the next iteration.
Strings on the sounding board
For strings, I decided to print plastic reeds, attach them on potentiometers with springs and measure deviation angles.
I modeled them in Solid and printed to evaluate the ergonomics.
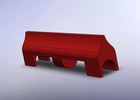

Feels nice to the touch. It must work.
Sensors on the finger-board
The guitar is intended to have 6 strings and 12 frets. In total, it is 72 sensors on the finger-board, and other 6 on the sound board. I could use a tact button for each element, but, first, they clap, and, secondly, it will be impossible to apply techniques such as slide or vibrato. It is also desirable to define strength of pressure.
It looks like tenzoresistive sensors are most suitable for this goal. They change their resistance depending on the pressure on working area.
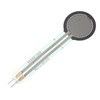
It turned out that it was quite difficult to find them in stock in the needed quantity, and they cost a great deal. So I ordered them on Ali.
ADC
For poll of status of each sensor, I need ADC. There are just a few of them in the STM, so for polling 78 sensors, I will need something else. I could use external multi-channel ADC chips, but they are too expensive. So I decided to put five inexpensive 16-channel analog multiplexers CD74HC4067, and connect to each one channel of STM's ADC.
PCB
While my tenzoresistors are on the way, I’m starting board wiring. The sensor outlets are long, so I had to lay them overlapping.


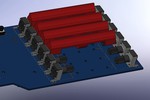
Before ordering the board printing, I decided to wait for tenzoresistors. And, as it turned out, not in vain.
Of 80 sensors, I found that only a few were in order, and even they had different parameters
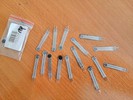
They notably differ from their images on the seller’s website for the worst.
But what did I expect when I bought electronic components on Ali?..
And then it dawned upon me.
I can use another detection method — measuring capacity like in touch sensors. It is much more affordable and available. And, if mechanics is projected correctly, defining strength will be possible as well.
Well, I’m removing everything which has been done before.

Starting from scratch.
In the new version of minimalistic proof of concept, as sensor elements I’ve chosen small cylinders cut out of 4mm coper rod soldered to the PCB.
Now I need to invent how to measure 78 capacities.
Sensor polling
After googling a little bit, I found that there are many chips — sensor keyboard controllers. Among them, I could find an inexpensive 12-channel measurer of universal capacity. It measures capacity in scale of picofarad units, which should be sufficient for a strength measuring scheme, which I’m going to implement in the next modifications. Additionally, just in case, I’ve hanged a footprint for a button or something of the kind on each element of the finger-board. And made cuts in the board, so that I could not only touch the cylinder, but also press on it inside. I’ll try to experiment with different playing techniques.
The chip is connected via I2C interface, and has two configuration pins which set the address. Respectively, you can hang at most four chips on one bus. And I need 12. That’s not a problem: I’m dividing them into three groups and connecting to STM's bus via multiplexer.
PCBs


This time I could order the board and even wait till it is ready.
After the components, copper cylinders and potentiometers are soldered, I understood that construction with plastic strings is too complicated. So for a while I decided to hang the same sensor cylinders on the sound board, but a bit longer. In order not to make over the whole board, I’ve made a small extension board and connected it to the second I2C bus of STM.
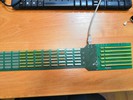
The hardware is ready. The next goal is to make it play.
Software
The plan is following:
- To download a virtual synthesizer which can work with midi-devices and produce guitar sounds.
- To create a firmware which will poll sensors and transmit the results to the PC via USB custom HID interface approximately 100 times a second.
- To create a program on Python which will accept these data, emulate virtual midi-device, generate midi-packages, and submit them to the virtual synthesizer.
I decided to figure out a bit later how to pretend to be a midi-device.
What will play the sound?
I found that there are quite a lot of virtual synthesizers for Windows with midi support. I’ve tried Ableton live, RealGuitar, FL studio, Kontakt. I’ve settled on RealGuitar because it is simple and designed particularly for guitar. It can even imitate imperfection of human playing – slide of fingers along the strings, randomized parameters of note extraction.
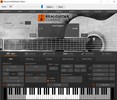
Connection to virtual synthesizer
For Python I could found «mido» library, which can emulate virtual midi-port, which, via external emulator of midi-cables «loopmidi», can be connected to the input of the virtual synthesizer.

In the program interface, I’ve made a graphic visualization of the level of the measured capacity for each sensor to simplify filter tweaking. I’ve also added LED controls for the future, vibromotor (I don’t know the purpose, but it will also be in the guitar), accelerometer data visualization, and the battery power.
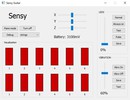
It is necessary to map all the 72 sensors for respective note, so that hits on the guitar strings cause playing correct note.
It turned out that, of 72 elements on 12 frets, there are only 37 unique notes. They are located according to certain structure, so, instead of building a large table, I could strike a simple equation, which, by sensor number, distributes the number of the respective note.

Test
It looks like everything is ready for the first test. I didn’t feel like sawing rods and soldering all the 12 frets, so I limited with 8. The moment of truth:
Извините, данный ресурс не поддреживается. :(
IT’S ALIVE! Concept viability is proven. I’m walking on air! But it’s not time to relax.
The next stage is adding LEDs, accelerometer, vibromotor, accumulator, wireless connection, body and possibility to work without drivers or midi-emulation programs on all the popular platforms.
LEDs
In order to connect 84 LEDs, I’ve chosen the easiest way – daisy chain of 14 8-bit shift registers. It is comfortable to connect them to STM's SPI MOSI output and send the data arrays via DMA without involving the core.
Accelerometer
I didn’t have special requirements to the accelerometer, so I’ve taken the simplest — LIS3D. It will help the guitar define its slope to the horizon, which will allow to modulate different sound filters during the play with hand movements.
Wireless
For wireless data transmission, I decided to install ESP32. It supports different protocols of Bluetooth and WI-FI, the field for experiments will be opened (at that time I didn’t know that, in my case, there is only one correct method of connection).
Body
The body must be folded, so electronic components of the sound board and the finger-board should be divided in two PCBs, and connected with a flex cable.
The power will be switched in opening the body, by approaching the magnet on the finger-board to the Hall sensor on the PCB of the sound board.
Beginning of the work
A lot of experiments were done with different constructions of tactile elements of the finger-board and LED diffusors. I wanted all the surface of the element to shine evenly, and, at the same time, possibility of touch detection and pressing the buttons was reserved.

I consulted with a friend of mine who is a professional industrial designer. We invented construction of the guitar flexion unit, and then he designed and printed the body prototype.
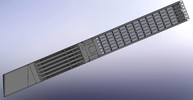
It looks like everything is reasoned out, and I can start PCB tracing.


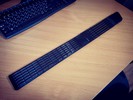
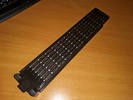
MIDI device
First of all, in the new version, I wanted guitar to be defined as a midi-device, in connecting via USB, without any extra programs.
I found that it is not so difficult – all the specifications can be found on usb.org. But all the algorithms which were performed by the Python application, had to be rewritten in C to the controller.
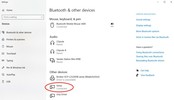
I was surprised that it started to work on all the devices at once. Windows 10, MacOS, Debian 9, Android (via USB-adapter). Just insert the cable, and the MIDI-device named «Sensy» appears in the system, and is read by all the synthesizers. I couldn’t test it with iPhone yet, for I haven’t got the adapter. But it should work the same way.
Wireless interface
The next goal is organizing wireless work.
I didn’t feel like googling at once, so I spent a few days on testing different wireless interfaces. I rejected BLE at once, as in my mind “Low energy»” is closely associated with low frequency of package transmission. I’ve tried WI-FI in the client mode, WI-FI in access-point mode, Bluetooth in SPP mode, etc. The problem was the same everywhere – enormous delay (over 100 ms approximately), and unevenness of the events in time. So it was impossible to play.
I was already about to give up and make a separate dongle which could be inserted in mobile phone or PC USB, and accept data from the guitar via custom radio.
But then by chance I came across specification for new versions of BLE protocol and found that its minimal connection interval is 7.5 ms, which perfectly meets my requirements.
Moreover, I found out that there was BLE MIDI protocol, which is supported by all the new operation systems, and works without any drivers just like via USB MIDI.
The only problem was that such a low connection interval and BLE MIDI in general is supported only by relatively new platforms. I will have to find out the details yet, but the tests with available devices were successful.
On some new iPhones, there is a pre-installed virtual synthesizer «Garage Band» which can produce high-quality guitar sounds (if not, you can download it in App Store for free).
Firmware
Having written the minimum necessary functionality, I was stopped directly by STM's flash capacity. Only 168 bytes remained unoccupied. Evidently, silicon gods were graceful to me, so I’m moving in the right direction.

I could immerse in the code optimization and significantly reduce the volume of the occupied memory, but it will be easier to use thicker controller in the next version, which costs 5 cent more, and not spend my time. Moreover, who knows what other features I’ll need to add?
But minimum functions are not enough – I also have to work with play techniques. First of all, I want to implement Slide. It is when you start to play a note with a certain pressed fret, and your hand slides along the finger-board, jumping from fret to fret.
I’ve already had a lot of fun with USB, so I can comment all the code related to it, and clear the memory. It can be tested via wireless, too
Извините, данный ресурс не поддреживается. :(
When all the LEDs are on, you can use the guitar if you got lost in a dark cavern.

What are the drawbacks of this construction?
- The pressure strength is not measured on the sensors. It brings about three problems:
- There are always occasional interference of the neighboring strings both on the sound board, and on the finger-board. It makes the play very difficult
- All the played notes are produced at the same sound level. Most of the tested audience don’t notice it, but I’d like to have the play which is closer to real guitar
- It is impossible to use hammer on, pull off and vibrato techniques
- The LEDs are monochromatic. It limits visualization in playing by tablatures. I’d like to have a possibility of indicating different playing techniques with different colors.
- The body shape is not suitable for left-handed persons. From the prospective of soft, I’ve already implemented string inversion by accelerometer. But mechanical petal which is necessary for holding the guitar with your hand during the play, turns only to the side comfortable for right-handed persons.
- There is no rest for foot. Now, when you play in sitting position, the lowest string nearly touches your leg, and it is uncomfortable.
- The guitar flexion unit requires comprehension and revision. Probably, it is not reliable and stable enough.
It’s time to move to development of the next version.
I’m moving to controller of STM32F07 series. It already has 128 kB of flesh memory – it is enough for any functions. And even for Easter eggs.
Using ESP32 in the final version of the guitar would be too posh, so I went to search for something more conventional. I’ve chosen NRF52 by criteria of availability, presence of documentation and adequacy of the website.
Certainly, three main innovations will also be implemented:
- The LEDs will be RGB from now on,
- Each finger-board sensor will have strength measuring (tact buttons are not necessary anymore),
- The strings on the sound board will be flexible.
For the moment, the sound board plate looks like this (I’ve left the ESP footprint just in case):
Извините, данный ресурс не поддреживается. :(
The project is called Sensy and now is being actively developed. I am already completely sure that all the intended functions will be implemented, so we took our decision to develop it in future.
We are based in Saint-Petersburg, and now our team consists of two persons: I’m responsible for technical component, and my partner – for marketing, finance, legal questions.
If you are interested in following the project news, leave your email in the feedback form on the website, and subscribe to our social media.
I’m really looking forward to feedback from Habr community, with your comments and suggestions!
A funny episode from the development process
SPL
I'm sitting debugging NRF52, trying to output data via UART. Nothing comes out. I checked the code, soldered, even re-soldered the chip, nothing helps.
And then I accidentally reboot the board in a non-standard way — the letter «N» in ascii comes to the terminal. This corresponds to the number 0x4E, which I did not send. I reboot again — the letter «O» comes. It's strange. Maybe there is a problem with the quartz resonator and the baud rate is out of order? I change the frequency in the terminal, reboot the board — “N” comes again. With each new reboot comes a new letter, which eventually form a repeating phrase «NON GENUINE DEVICE FOUND».
What does this NRF allow itself? I reset the firmware. How does it even remember after the reboot what was sent the previous time? It looked like a spiritualistic session of some kind. Maybe I am that NON GENUINE DEVICE?
Climbed into Google, found out that the manufacturers of ftdi chips, which are in USB-UART dongles, have come up with a way to deal with Chinese counterfeits. The Windows driver checks the originality of the chip and, on the fly, replaces the incoming data with this phrase in case it is fake. Obviously my dongle turned out to be a fake and switching to another one solved this problem.
Thanks again to the Chinese.
Thank you for your attention!
===========
Источник:
habr.com
===========
Похожие новости:
- [Safari, Google Chrome, Медийная реклама, Контекстная реклама, Повышение конверсии] Обновленный браузер Safari: как быть маркетологам
- В Raspberry Pi 4 появилась возможность загрузки с USB-накопителей
- [Беспроводные технологии, Программирование микроконтроллеров, Разработка для интернета вещей, Производство и разработка электроники, Интернет вещей] ИК датчик движения на STM32
- [Беспроводные технологии, Гаджеты, Информационная безопасность, Умный дом] Bluetooth-атака BLESA затрагивает миллиарды мобильных устройств
- [Разработка под iOS, Смартфоны, IT-компании] В iOS 14 баг: перезагрузка устройства не сохраняет настройки приложений по умолчанию
- [IT-инфраструктура, Информационная безопасность, Разработка под Android, Разработка под iOS] Особенности обновлений прошивки мобильных устройств
- [Разработка для интернета вещей, Гаджеты, Умный дом] Подключаем новый Xiaomi Gateway 3 к Home Assistant без паяльника и смс
- [Системное администрирование, Серверное администрирование, DevOps, Kubernetes] Бесплатный вебинар «Обзор возможностей Kubespray»
- [Swift, Программирование, Разработка мобильных приложений, Разработка под iOS] Виджеты в iOS 14 – возможности и ограничения
- [IT-компании, Игры и игровые приставки, Монетизация мобильных приложений, Разработка под iOS] Apple обвинила Epic Games «разжигании», но предложила вернуться в App Store без своей системы оплаты
Теги для поиска: #_ja_piarjus (Я пиарюсь), #_sensy, #_stm32, #_bluetooth, #_ble, #_midi, #_usb, #_andriod, #_ios, #_guitar, #_electronics, #_startup, #_mobile, #_ja_piarjus (
Я пиарюсь
)
Вы не можете начинать темы
Вы не можете отвечать на сообщения
Вы не можете редактировать свои сообщения
Вы не можете удалять свои сообщения
Вы не можете голосовать в опросах
Вы не можете прикреплять файлы к сообщениям
Вы не можете скачивать файлы
Текущее время: 02-Дек 13:15
Часовой пояс: UTC + 5
| Автор | Сообщение |
|---|---|
|
news_bot ®
Стаж: 7 лет 9 месяцев |
|
 In this article, I’ll try to describe roughly how I’m creating a device, from the idea to realization of the usable prototype. My name is Dmitriy Dudarev. I develop electronics, and really enjoy creating different portable devices. I also enjoy music. Half a year ago, I borrowed acoustic guitar from my friend, so that I could learn to play it from lessons on Youtube and tablatures. It was a hard work. Maybe, I did something wrong, or tried not so hard, or fine motor skills prevented multiplication in my predecessors’ community. In any case, I couldn’t achieve anything but sounds of raspy strings. My resentment was strengthened by constant string detune. And others didn’t really enjoy much listening my uneven Nothing else matters for thousand times. But, going through all these tortures, I haven’t forgotten the main rule of electronics engineer. If something exists, you can put microcontroller there. Or, at least, make a portable electronic modification. Idea Structure of digital guitar started to emerge in my mind. First of all, I’ve made a list of the device requirements:
Certainly, it will be necessary to create an app for mobile platforms, where it will be possible to choose a tablature for learning with LEDs, choose an instrument (acoustic, classical, electric guitar, with different filter presets, etc.), and play sounds. Supposedly, I must get a compact instrument which you can play like a guitar without analog drawbacks, and equipped with visual learning system. Sounds realistic. Analogs Well, first of all, being armed with the thought that nowadays it is almost impossible to invent something really new, and somebody has already done it, I’m looking up in Google. In fact, it turned out that the first digital guitar was created back in 1981, but it wasn’t used widely because of limited functionality.  Modern compact midi-guitars also exist, but they are designed for more professional target audience, expensive, and, above all, without “press-on-LED” mode. There are also exotic variants, with iPad instead of strings or in the shape of mollusk.   So I can start. Proof of concept I decided to start with proof of concept. Minimal prototype offhand. First of all, I should define the element base. Controller In my projects, most often I use STM32. They are powerful, inexpensive, available. I’ve chosen STM32F042. It has USB (moreover, with special internal 48MHz-generator, not to put external quartz), 32-bit core, and all the necessary peripherals. And all this costs less than a buck. I decided to leave wireless connection for the next iteration. Strings on the sounding board For strings, I decided to print plastic reeds, attach them on potentiometers with springs and measure deviation angles. I modeled them in Solid and printed to evaluate the ergonomics.   Feels nice to the touch. It must work. Sensors on the finger-board The guitar is intended to have 6 strings and 12 frets. In total, it is 72 sensors on the finger-board, and other 6 on the sound board. I could use a tact button for each element, but, first, they clap, and, secondly, it will be impossible to apply techniques such as slide or vibrato. It is also desirable to define strength of pressure. It looks like tenzoresistive sensors are most suitable for this goal. They change their resistance depending on the pressure on working area.  It turned out that it was quite difficult to find them in stock in the needed quantity, and they cost a great deal. So I ordered them on Ali. ADC For poll of status of each sensor, I need ADC. There are just a few of them in the STM, so for polling 78 sensors, I will need something else. I could use external multi-channel ADC chips, but they are too expensive. So I decided to put five inexpensive 16-channel analog multiplexers CD74HC4067, and connect to each one channel of STM's ADC. PCB While my tenzoresistors are on the way, I’m starting board wiring. The sensor outlets are long, so I had to lay them overlapping.    Before ordering the board printing, I decided to wait for tenzoresistors. And, as it turned out, not in vain. Of 80 sensors, I found that only a few were in order, and even they had different parameters  They notably differ from their images on the seller’s website for the worst. But what did I expect when I bought electronic components on Ali?.. And then it dawned upon me. I can use another detection method — measuring capacity like in touch sensors. It is much more affordable and available. And, if mechanics is projected correctly, defining strength will be possible as well. Well, I’m removing everything which has been done before.  Starting from scratch. In the new version of minimalistic proof of concept, as sensor elements I’ve chosen small cylinders cut out of 4mm coper rod soldered to the PCB. Now I need to invent how to measure 78 capacities. Sensor polling After googling a little bit, I found that there are many chips — sensor keyboard controllers. Among them, I could find an inexpensive 12-channel measurer of universal capacity. It measures capacity in scale of picofarad units, which should be sufficient for a strength measuring scheme, which I’m going to implement in the next modifications. Additionally, just in case, I’ve hanged a footprint for a button or something of the kind on each element of the finger-board. And made cuts in the board, so that I could not only touch the cylinder, but also press on it inside. I’ll try to experiment with different playing techniques. The chip is connected via I2C interface, and has two configuration pins which set the address. Respectively, you can hang at most four chips on one bus. And I need 12. That’s not a problem: I’m dividing them into three groups and connecting to STM's bus via multiplexer. PCBs   This time I could order the board and even wait till it is ready. After the components, copper cylinders and potentiometers are soldered, I understood that construction with plastic strings is too complicated. So for a while I decided to hang the same sensor cylinders on the sound board, but a bit longer. In order not to make over the whole board, I’ve made a small extension board and connected it to the second I2C bus of STM.  The hardware is ready. The next goal is to make it play. Software The plan is following:
I decided to figure out a bit later how to pretend to be a midi-device. What will play the sound? I found that there are quite a lot of virtual synthesizers for Windows with midi support. I’ve tried Ableton live, RealGuitar, FL studio, Kontakt. I’ve settled on RealGuitar because it is simple and designed particularly for guitar. It can even imitate imperfection of human playing – slide of fingers along the strings, randomized parameters of note extraction.  Connection to virtual synthesizer For Python I could found «mido» library, which can emulate virtual midi-port, which, via external emulator of midi-cables «loopmidi», can be connected to the input of the virtual synthesizer.  In the program interface, I’ve made a graphic visualization of the level of the measured capacity for each sensor to simplify filter tweaking. I’ve also added LED controls for the future, vibromotor (I don’t know the purpose, but it will also be in the guitar), accelerometer data visualization, and the battery power.  It is necessary to map all the 72 sensors for respective note, so that hits on the guitar strings cause playing correct note. It turned out that, of 72 elements on 12 frets, there are only 37 unique notes. They are located according to certain structure, so, instead of building a large table, I could strike a simple equation, which, by sensor number, distributes the number of the respective note.  Test It looks like everything is ready for the first test. I didn’t feel like sawing rods and soldering all the 12 frets, so I limited with 8. The moment of truth: Извините, данный ресурс не поддреживается. :( IT’S ALIVE! Concept viability is proven. I’m walking on air! But it’s not time to relax. The next stage is adding LEDs, accelerometer, vibromotor, accumulator, wireless connection, body and possibility to work without drivers or midi-emulation programs on all the popular platforms. LEDs In order to connect 84 LEDs, I’ve chosen the easiest way – daisy chain of 14 8-bit shift registers. It is comfortable to connect them to STM's SPI MOSI output and send the data arrays via DMA without involving the core. Accelerometer I didn’t have special requirements to the accelerometer, so I’ve taken the simplest — LIS3D. It will help the guitar define its slope to the horizon, which will allow to modulate different sound filters during the play with hand movements. Wireless For wireless data transmission, I decided to install ESP32. It supports different protocols of Bluetooth and WI-FI, the field for experiments will be opened (at that time I didn’t know that, in my case, there is only one correct method of connection). Body The body must be folded, so electronic components of the sound board and the finger-board should be divided in two PCBs, and connected with a flex cable. The power will be switched in opening the body, by approaching the magnet on the finger-board to the Hall sensor on the PCB of the sound board. Beginning of the work A lot of experiments were done with different constructions of tactile elements of the finger-board and LED diffusors. I wanted all the surface of the element to shine evenly, and, at the same time, possibility of touch detection and pressing the buttons was reserved.  I consulted with a friend of mine who is a professional industrial designer. We invented construction of the guitar flexion unit, and then he designed and printed the body prototype.  It looks like everything is reasoned out, and I can start PCB tracing.      MIDI device First of all, in the new version, I wanted guitar to be defined as a midi-device, in connecting via USB, without any extra programs. I found that it is not so difficult – all the specifications can be found on usb.org. But all the algorithms which were performed by the Python application, had to be rewritten in C to the controller. I was surprised that it started to work on all the devices at once. Windows 10, MacOS, Debian 9, Android (via USB-adapter). Just insert the cable, and the MIDI-device named «Sensy» appears in the system, and is read by all the synthesizers. I couldn’t test it with iPhone yet, for I haven’t got the adapter. But it should work the same way.  Wireless interface The next goal is organizing wireless work. I didn’t feel like googling at once, so I spent a few days on testing different wireless interfaces. I rejected BLE at once, as in my mind “Low energy»” is closely associated with low frequency of package transmission. I’ve tried WI-FI in the client mode, WI-FI in access-point mode, Bluetooth in SPP mode, etc. The problem was the same everywhere – enormous delay (over 100 ms approximately), and unevenness of the events in time. So it was impossible to play. I was already about to give up and make a separate dongle which could be inserted in mobile phone or PC USB, and accept data from the guitar via custom radio. But then by chance I came across specification for new versions of BLE protocol and found that its minimal connection interval is 7.5 ms, which perfectly meets my requirements. Moreover, I found out that there was BLE MIDI protocol, which is supported by all the new operation systems, and works without any drivers just like via USB MIDI. The only problem was that such a low connection interval and BLE MIDI in general is supported only by relatively new platforms. I will have to find out the details yet, but the tests with available devices were successful. On some new iPhones, there is a pre-installed virtual synthesizer «Garage Band» which can produce high-quality guitar sounds (if not, you can download it in App Store for free). Firmware Having written the minimum necessary functionality, I was stopped directly by STM's flash capacity. Only 168 bytes remained unoccupied. Evidently, silicon gods were graceful to me, so I’m moving in the right direction.  I could immerse in the code optimization and significantly reduce the volume of the occupied memory, but it will be easier to use thicker controller in the next version, which costs 5 cent more, and not spend my time. Moreover, who knows what other features I’ll need to add? But minimum functions are not enough – I also have to work with play techniques. First of all, I want to implement Slide. It is when you start to play a note with a certain pressed fret, and your hand slides along the finger-board, jumping from fret to fret. I’ve already had a lot of fun with USB, so I can comment all the code related to it, and clear the memory. It can be tested via wireless, too Извините, данный ресурс не поддреживается. :( When all the LEDs are on, you can use the guitar if you got lost in a dark cavern.  What are the drawbacks of this construction?
It’s time to move to development of the next version. I’m moving to controller of STM32F07 series. It already has 128 kB of flesh memory – it is enough for any functions. And even for Easter eggs. Using ESP32 in the final version of the guitar would be too posh, so I went to search for something more conventional. I’ve chosen NRF52 by criteria of availability, presence of documentation and adequacy of the website. Certainly, three main innovations will also be implemented:
For the moment, the sound board plate looks like this (I’ve left the ESP footprint just in case): Извините, данный ресурс не поддреживается. :( The project is called Sensy and now is being actively developed. I am already completely sure that all the intended functions will be implemented, so we took our decision to develop it in future. We are based in Saint-Petersburg, and now our team consists of two persons: I’m responsible for technical component, and my partner – for marketing, finance, legal questions. If you are interested in following the project news, leave your email in the feedback form on the website, and subscribe to our social media. I’m really looking forward to feedback from Habr community, with your comments and suggestions! A funny episode from the development processSPLI'm sitting debugging NRF52, trying to output data via UART. Nothing comes out. I checked the code, soldered, even re-soldered the chip, nothing helps.
And then I accidentally reboot the board in a non-standard way — the letter «N» in ascii comes to the terminal. This corresponds to the number 0x4E, which I did not send. I reboot again — the letter «O» comes. It's strange. Maybe there is a problem with the quartz resonator and the baud rate is out of order? I change the frequency in the terminal, reboot the board — “N” comes again. With each new reboot comes a new letter, which eventually form a repeating phrase «NON GENUINE DEVICE FOUND». What does this NRF allow itself? I reset the firmware. How does it even remember after the reboot what was sent the previous time? It looked like a spiritualistic session of some kind. Maybe I am that NON GENUINE DEVICE? Climbed into Google, found out that the manufacturers of ftdi chips, which are in USB-UART dongles, have come up with a way to deal with Chinese counterfeits. The Windows driver checks the originality of the chip and, on the fly, replaces the incoming data with this phrase in case it is fake. Obviously my dongle turned out to be a fake and switching to another one solved this problem. Thanks again to the Chinese. Thank you for your attention! =========== Источник: habr.com =========== Похожие новости:
Я пиарюсь ) |
|
Вы не можете начинать темы
Вы не можете отвечать на сообщения
Вы не можете редактировать свои сообщения
Вы не можете удалять свои сообщения
Вы не можете голосовать в опросах
Вы не можете прикреплять файлы к сообщениям
Вы не можете скачивать файлы
Вы не можете отвечать на сообщения
Вы не можете редактировать свои сообщения
Вы не можете удалять свои сообщения
Вы не можете голосовать в опросах
Вы не можете прикреплять файлы к сообщениям
Вы не можете скачивать файлы
Текущее время: 02-Дек 13:15
Часовой пояс: UTC + 5
